These two weeks involved lots of different activities, including content creation (crouch animations, particle effects), code cleaning and developing new systems.
Some of the work can be seen in this animation:

Objective UI
Design upgrades & implementation.

The design was simplified to reduce some coding issues and make it easier to understand. Used more artistic representations (strikethrough lines and question marks) instead of words and clever groups. Double readability of everything (words + symbols) seems like a good rule for accessible UI.
The implementation required refactoring some of the systems made for the previous (mini-)game to include things like radio buttons and control themes. This is more or less the current state of the implementation:

I expect to finish this up in the following weeks as the UI is ~50% done.
Scripted items
Interactive entities defined fully in SGScript code.

I needed some way to easily produce destructible/dynamic items, which was the reason behind the design of scripted items. Currently they support:
- 4 mesh slots with separate offset matrices, enable/disable
- 4 particle system slots with separate offset matrices, play/stop/trigger
- decal system override to take decals from attached meshes and move them with the mesh
- script metadata (can be used for health/time/... info)
- update & bullet hit event scripting
Most items will probably work according to these few rules (which are fully supported now):
- set up meshes, particle systems and decal system override and health counter
- set up hit event that, on zero health, disables the mesh and decal system override, and triggers the particle effect
However, there are still a few things that might be necessary to add for proper effect coverage:
- mesh particles (ability to specify mesh to use and perform rotation animation)
- setting particle system matrix from mesh AABB (this is to simplify putting all particles approximately inside the mesh)
- rigid body to use for object movement or to prevent characters from passing through the object
Some future wishes:
- oversized hitboxes for meshes (I'd like some paper heaps to get disturbed by nearby bullets even if they don't hit)
- particle collisions (perform raycasts along particle paths and react to intersections accordingly)
- spawning decals on particle collisions
Other work
Minor upgrades that are still quite important.

- missiong crouching animations were added (crouch-sit/crouch-move-backwards)
- additional bullet hit effects were created and some were improved
- particle/decal lighting was fixed, now they both use the light sample tree produced in the previous two weeks
- camera behavior is now almost completely done
- work was started on AI
- objective system was upgraded to include additional parameters (description, if required, optional location)
In the end, I'd just like to mention this one idea that popped up recently - producing a storyless, arcadey, gameplay-test shooter that would be released before TACStrike and contain pretty much just the shooting aspect of the game. Full alert mode, minimal stealth, no exploration, just fighting against AI in different environments, trying to survive various encounters.
The reason behind the idea is that I've been struggling with the shooting aspect of the game due to the chosen perspective of the game (aiming is currently somewhat unintuitive at the moment) and I'd like not to bet on too many moving parts with a big game. Exploration takes time to be fun, fights require tweaking. I'd like to tweak first and take the time later (preferably with some funding gained in the process).
Add a commentThe work done in these two weeks was so varied that it's hard to describe it in a few words. There's also nothing new in terms of character motion and effects so a video won't help much this time. So, let's just dive right into it.
But I do have one gif "video" of the item pickup feature:

HUD Map update & some basic UI for usable item highlighting

The map update consists of showing enemy positions and cones of vision.
As for the item UI - just drawing a circle, line, transparent rectangle and its outline. Or is it just that simple?
Turns out, it isn't so simple if antialiasing has to be used for UI even if 3D doesn't require it.

The way this is achieved is by first generating the polygon that needs to be rendered and adding an outline to it on rendering. There are some differences between line and polygon rendering, and there are limitations (up to 90 degree corners, can only render lines/polygons in one color, polygons must be convex). But it's exactly enough for most designs, and as the designer, I can keep the system's limitations in mind.
Usable items
First I attached the UI to items that can be picked up.

Then I created a new "actionable" entity. Couldn't think of a more appropriate noun at the time for the type name. Also, I forgot to put that into a separate screenshot so it'll just show up later on in this post.
Fixing the lighting, again.
Turns out the previous method was highly "combustible" (didn't work often) even after some redesigns so I finally redesigned it along more mathematically stable lines.

A mathematically (and universally) stable method generally requires no intersection computations of any kind. If a method is not analytical or returns a strict boolean value, it is not stable. Numbers tend to be imprecise with computers and thus these methods are, as well. Protip: any method suggested by crazy mathematicians such as Delaunay triangulation will most likely waste a lot of time while reaching some stability and very few actually stable implementations exist (if any).
Rant aside, my approach this time around was rather simple: BVH (AABB) to gather sample points, do inverse squared distance weighting to combine the light values. If anything goes wrong, sampling radius can be increased (and is always adjustable) and that'll be it. No more complications.
Also, I removed the need to place samples manually by generating them (as seen in the above picture). This should save me some time in the future in case I want to make visibility dependent on lighting.
Blood decals
When they finally get to be fixed, it should be a nice addition to the scene.

Two reasons for brokeness: 1) no lighting = why they're black, and 2) for some reason they are made off of character meshes as well (which not only looks wrong but is a performance issue as well). As soon as those get fixed, we get some cool blood on the walls from shootouts.
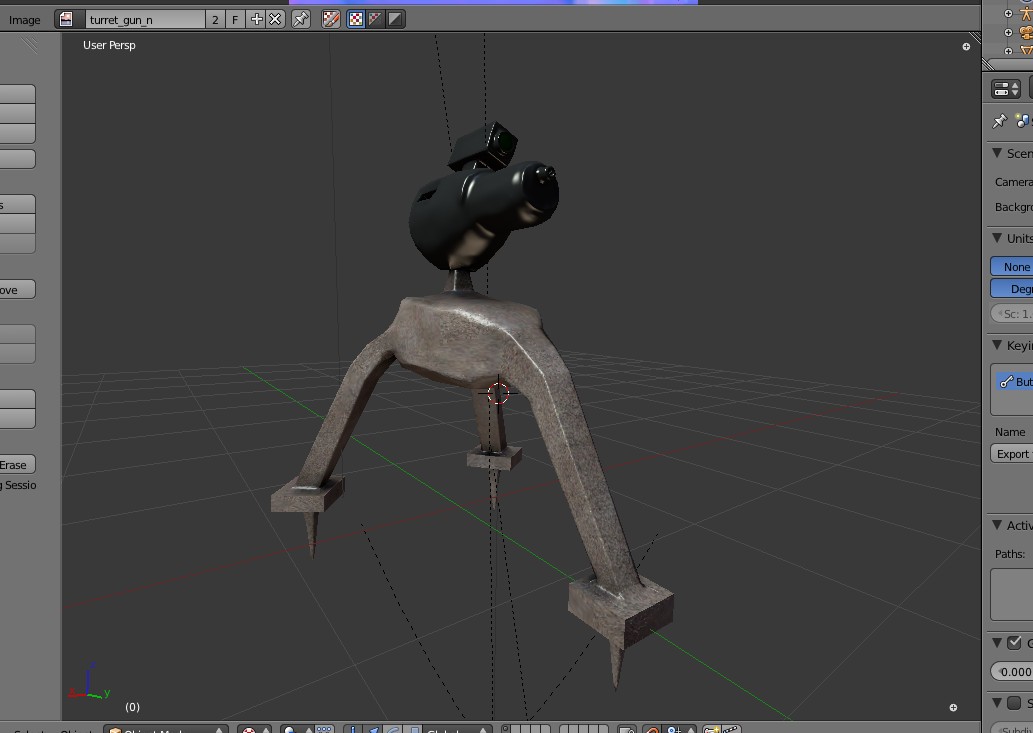
The Camera
Just another entity in the game.

This was the model I created in Blender. Nothing too exciting but then again, it'll be rather small from the player's point of view.
When it was time to make it alive, I took the character editor to make it happen.

The specifics of the entity required changes in editor (character selection) so that had to come as well. But since it looks just like mesh selection...

... it's not in the screenshot and what we see is just the preview of the entity.
After that I started implementing the entity in game.

At this point it's moving from side to side with configurable timeouts and has a flare to indicate its state of alertness. I also added the position and view cone in the map, but there's no more behavior implemented for it at this point. Oh and by the way - here's that "actionable" entity - the lamp with some UI connected to it.
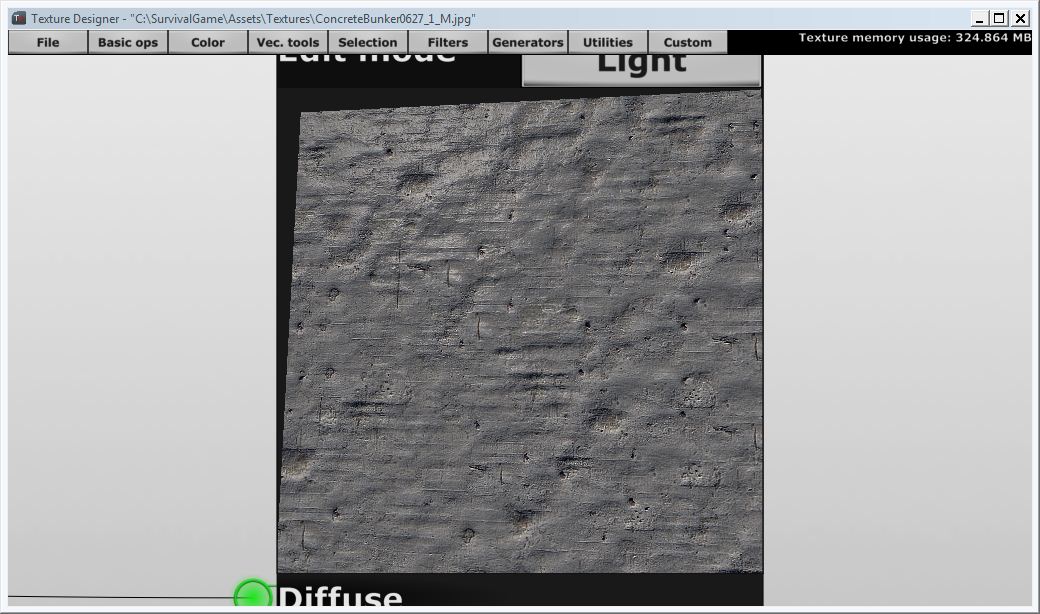
Editor upgrade - apply surface texture fitting.
Just something I've been slightly needing for some time.

I can now apply fitting which allows me to avoid messing up texture coordinates while resizing the block.
Objective UI design
This screen shows all mission objectives and all available info about them.

I would like to say that gameplay is coming soon but it's hard to tell if/when I'll get there. There had been growing worries about the possible lack of variety of the available content, which was one of the reasons I started to work on the camera. But it does seem that it's close.
AI is finally getting some design time, which is very good. Soon I should figure out how to build it in a way to make everything work right.
Add a commentBullet hit effects, icon fonts, AI - the direction of work in these three weeks. Well, not exactly three weeks, some side projects just had to bump into my schedule and I didn't feel like posting half a blog post in the previous week. To try and make up for this gap, here's a video:
Now, moving on to the details.
Bullet hit effects
So I was working on particles a few months ago and decals/bullets about a month ago, and it was time to put it together.

It's still missing some smoke and stuff flying around but it's nothing that couldn't be fixed in an hour with the particle system editor. Main goal now was to just put the whole thing together so that it would look somewhat nice. I think that's already achieved.
Icon fonts
For when you want cheap & easy scalable graphics and a way to edit those.

Ingredients:
- the quite awesome Nano SVG library
- a bit of refactoring to support multiple types of fonts
The reason for using the font system instead of being more generic and more low-level is quite simply the need to put icons between words. It's not that hard to do it yourself but... you still have to do it. This way, I don't, which makes it easier to communicate with the player.
It's also a great way to avoid the issues I had with my last 3rd person action/adventure demo where people couldn't see that "[Button 1]" didn't read "Button 11" (because in a certain distance that is >0.5m away from the screen it's actually very hard to see that). So basically, some solid rules for UX:
- less (data to read) is more (effective communication)
- prefer colors and basic shapes to text and symbols and especially avoid text with symbols mixed in
Anyway, the new icon rendering system is missing a couple of tweaks but is generally readable, which is just the most important thing.
AI - coroutines
One of the few core libraries I've written, SGScript, was missing this feature that I found rather important after reading an article on behavior trees.
It dawned on me that it was actually very possible to model behavior trees with just lots of boolean-returning functions running in another thread. For example, a sequence (runs each child node in order and returns if either fails) - is simply a sequence of functions with "&&" (logical AND operator) used as a separator. Selector - "||" (logical OR operator). Inverter would be the equivalent of "!" (logical NOT operator). Needless to say, this makes data-driving the implementation very easy, given proper tools.
By the way, the proper tools are coroutines - a lightweight replacement for threads. Since we don't require true parallellism and are fine with poking them regularly to get results, this appears to be a rather good choice.
At that point I did not have coroutines. But for three reasons I decided to implement them:
- I've always wanted SGScript to be competitive and that meant having coroutines eventually
- I finally understood the need and usage for coroutines and was determined enough to figure out a plan for implementing them
- I quite simply needed them to be there and using another library was out of the question (because they suck just that much)
In a few days, the implementation was done and there was much rejoicing. A few days ago I had found and fixed two bugs and everything seems to work fine now.
Except just one thing - serialization. I'm not quite sure how to approach that issue yet but there's no reason not to be able to create a solution that works at least for this one project.
AI - navigation mesh
a.k.a. "Walkable Space: Redefined"

Looks a bit strange but it's still great. Using Recast/Detour is easier than writing a library from scratch, even if I've done something similar before. The Y-up axis thing was a bit disconcerting but it's nothing I couldn't handle with some wrapper functions.
But, of course, navigation mesh is quite useless without pathfinding itself so that was implemented as well (the red line shows a test path):

A little side-story: the lighting was changed as a test after one bugfix. That darkening towards the upper edge of walls - that's a bug and it's actually darkening towards light height. The normals on the level mesh were miscalculated, which led to this awkward darkening and general lack of proper lighting.
Since there's not much else to say about navigation, let's move on.
Enemy
The beginning of an enemy agent.

I've taught it to run in circles. You can see it in the video. Not much but it's a start. What's more, I've developed the framework upon which to build further behaviors. The framework's not big and that's kind of the point. It needn't be big to allow me to do big things.
Also, I think I understand what to put at the core of AI behaviors - a loop that contains just two functions - "patrol" and "attack". Under "patrol", there would be following a predefined path as well as investigation for possible threats. And "attack" could include firefights and pursuits.
There's a few subsystems that need to be done before getting into detail here but you can rest assured that AI is my next and most important goal at this point.
Camera
Moving towards aiming direction for a better view...

...and not only that, there is a need for a bit of cinematic effects and camera is one of the basic elements of cinematic. I'm probably going to make this effect smoother, smaller by default and more configurable but I generally like it. It creates a hint of chaos, the inexact and uncertain nature of the world at any point in time, and that you have the power to control it, to use it for your benefit.
All in all, these three weeks have been full of distractions and full of very important work. I do hope though that this month is one full of small victories, and a bigger one in the end. The core gameplay is my next goal.
Add a commentCharacter editor was the subject of focus for these two weeks. Gameplay's not quite there yet but I am getting quite close, as you can see in the video (P.S. I'm aware of the "fire" coming out of the gun, it's expected to look strange at this point - it's just a placeholder):
Let's get into all the rest first, as character editor is a bigger topic.
Level design & editor improvements
Material lookup from texture names.

This was necessary to apply normalmap to water, for example. It's not easy to see at the moment but there's going to be an environment map and scrolling there as well and it will look more watery soon enough.
Shooting
What was done to make the video possible was rather simple - had to fix aiming, add weapon particle system, retrieve gun barrel attachment matrix, add basic bullet filtering (whoever shot it shouldn't get hit by it) and reconfigure shooting (faster bullet, different trigger, origin and direction).
To get there, however, some effort was required to build the...
Character editor
Editing/generating metadata for character meshes with realtime preview.

Character data consists of 5 major parts: mesh, bones, attachments, layers and masks.
Mesh must be selected from the "Edit character" tab, all very simple so far.
Bones are where it gets a bit more exciting. Apart from joints, that aren't implemented yet, there are bodies - physical representation of bones, and hitboxes - raycast-friendly representation. A body can be a box, a sphere or a capsule, with size/position/rotation relative to the bone. A hitbox is about the same thing, just limited to the box. Both can be generated automatically. Joints will be an important part of the system when I get to ragdolls, and that leaves bodies unused for now as well.

Attachments are the next best thing. They define a transform (position+rotation) that is relative to some bone. This makes it easy to position anything relative to any bone of the character, and to retrieve that position by a name, thus making positioning portable across multiple characters. This is how I place weapon particle effects at the right spot - I get the attachment matrix by name and pass it to the particle system.
But there's a plot twist - currently the weapon is welded into the character mesh, how could I possibly do the same thing when I make it possible to swap weapons? The answer is once again very simple - weapons will be characters. While they contain no bones, their transforms will still be relative to them.
This also allows me to define weapon "rest position" (on back for larger weapons, on the side of any leg for a sidearm) and placement of hats that could fall off while fighting.

Now while attachments determine where things should be put, layers do the opposite - they can produce basic movement (movement and rotation) in response to basic input (a number). They can be used to turn a character's upper and lower parts separately, or to make its arms go closer when near a wall, or turn its head towards a target etc.
So basically layers will be used to implement basic and responsive pseudo-IK, without constraint resolution.

And finally there's masks. They're most simple - specifies named sets of weights for bones, to use for masking bones to animation players (letting them affect only the specified bones by the given amount). Just like layers, it helps for upper/lower body part separation, to allow blending partial animations on the character (reloading animations rarely need to move legs, for example).

As I'm sure you know, many of these things can be easily done in code, however there's one issue - not all characters can have the same bone configuration. Even if the names can be matched (though as I found out - it's a bit of a pain to do so on Blender as bones lose their animation tracks and it takes time to restore them), transforms often can't. A slightly turned bone can make all the difference in the world, making weapons hover or appear to be sucked into something.
Since I can make enemies shoot bullets now, I would like to take the time to develop a fully animated character and work on the AI. If I can make all that work, the rest is not likely to cause much trouble.
Add a commentThree words - patches, subentities, unification - are required to describe rather accurately what was done in these two weeks. Of course, lots of smaller sub-tasks were approached in the process, yet the main goals remained consistent.
Patches

The path to this goal was not quite as simple as expected. In my previous post, I talked about the simplicity of patch editing. Well, in code it's not quite that simple. Some minimally clever bit handling tricks and good UI choices are necessary to make something like that work. And that's not all of course but there's just too much technical stuff to talk about. So the new conclusion is that it's not as much simple as it is stable in the sense that it's easy to predict when and how any feature should work.
The current full set of features:
- [2;16]x[2;16] vertices in a grid
- 1-4 texture/color layers
- possible to flip internal edge in every quad
- row/column insertion & deletion
- vertex moving in view with spatial snapping and screen-space surface projection
- full vertex editing in property editor
- vertex sculpting and color/alpha painting
- side extension and removal
- single point quad/vertex row & column selection
This is the first thing I could get to display:

The first test was about patch blending because it's just the coolest thing to have in level design - blending. Always amazing to see how snow blends over stone or grass fades to dirt occasionally. There's just something about the simple act of reproducing the impurity that is the mirror of the world around us. I only wish it was used more in contemporary level design.
Regarding other things I did in the process, I also found the need to unify all level objects into one base class, to reduce the state switching required to handle many objects as one. So here we have multiple entities and blocks selected, and extension points reflect the bounding box of combined data.

After some necessary distractions, I went back to patches and worked on patch painting (which included sculpting and color/alpha painting, either together or separately). Very important feature for terrains (or piles of dirt, which is pretty much the same thing, just smaller).

After that, vertex editing was implemented. This is where I also tested multiple layer blending. Due to the unification of systems, I should also add that patch vertex editing could be done together with block vertex editing. More for the benefit of my coding process than editing but a very good thing nonetheless.

At this point I was very interested in testing all the cool, new toys in a real life level editing situation. I made 3 test levels: road 1 (road patch on terrain patch), road 2 (3-layer blending) and factory interior (decal patches).


After these tests, I noticed a couple of bugs and areas that could be improved, such as converting multiple block surfaces into patches and changing their textures at the same time. This would be used to noticeably simplify column decoration, which was the weakest link at that point. After all that was done, I worked on the level a bit more, fixing some bugs along the way.
Then, after some time, there was nothing left but to get all these new, cool things into the game. Some rewriting of the map compiler had to be done, but luckily, it turned out smaller in the end.


The darkness in the pictures would be fixed soon after, before that I'd like to mention another piece of work that was quite important to development.
Subentities
Also known as hacking my way through the unorthodox potential requirement list of future features.

Goal: make it possible to define paths, polygons and other spatial, grouped data sets with additional parameters.
Idea: put entities under entities so that sub-entities would be implicitly associated to owner entities.
Implementation: shaken, not stirred.
At the price of a slight inconvenience for the level designer, a minor code modification that solves all possible (and some almost impossible) issues is a good deal. I initially thought I would define roof areas with this so that top of the level could be faded out to allow seeing through it. While that might be necessary at some point, it was possible to create design guidelines that did not largely depend on this.
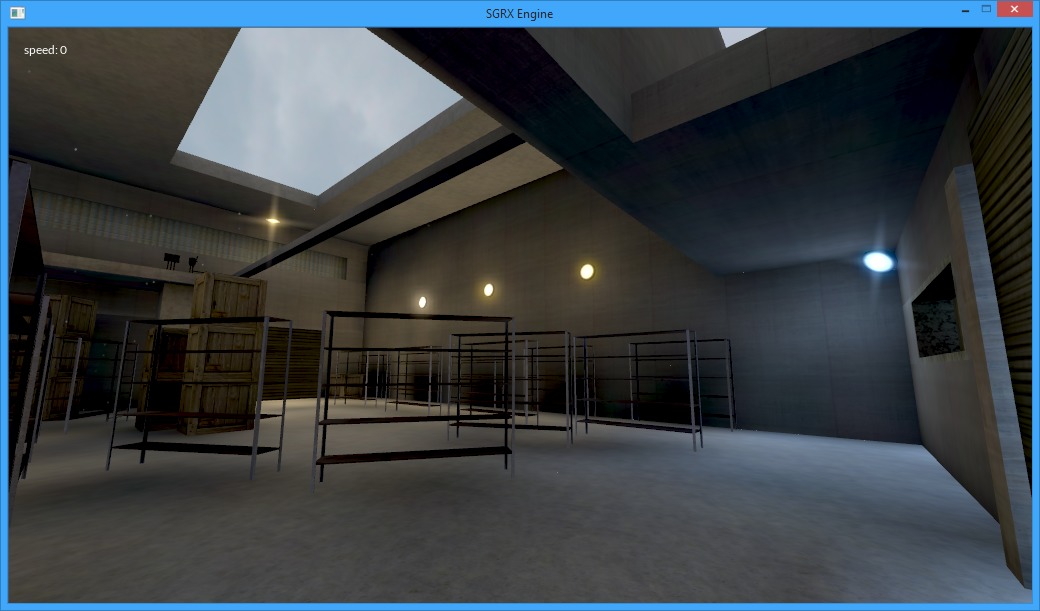
Stepping out of the darkness
Something I keep noticing is that I make my games too dark. Literally. That's kind of bad, even objectively - I was using mostly only the lower half of the color range, for some reason. Mathematically, it doesn't exactly make sense yet. But after the change, the result speaks for itself.
As for the design guidelines... I noticed that it's quite easy to put black patches on the top of most blocks. And to prevent them from being clipped but keep lightmapping features, I replaced the ceiling with a patch. Works rather nicely and at no extra cost. So naturally, as far as I can (and hopefully that goes to the end), I'm going to stick with this easy way to get the look I was going for.
In conclusion, I should resume work on the game itself now. I'd like to show something nice the next time I write.
Add a commentMore Articles...
Search
Latest images